For decades, SketchUp has been one of the most well-known 3D modeling programs in the design world, owed to its intuitive working tools and labyrinth of user-generated accessories, from open source libraries to plugins. Quite often, SketchUp is the software of choice for engaging children with architecture, due to its availability, flexibility, and ease of use.
Later in your design career, you could be forgiven for dismissing SketchUp as a 'rookie tool', a beginner's level below the advanced stages of Revit, Rhino, and AutoCAD. However, as SketchUp has evolved throughout the years, it now contains a formidable array of functions, capable of producing complex, exportable results in an organized, efficient manner for students and senior partners alike.
From geo-location to sun-paths, here are 10 very useful tips to make you the model SketchUp user of the office.
01. Use the 3D Warehouse gallery: check and purge models before importing them.
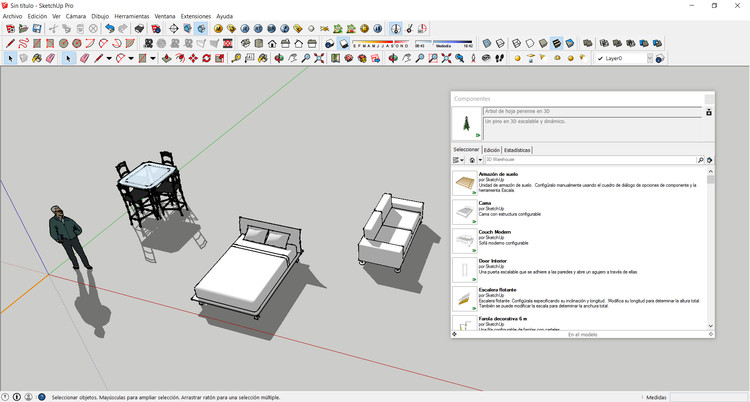
There is a universe of downloadable 3D models made by other users that can fast-track the construction of your own models. To avoid adding additional information such as lines, layers, and materials, which will only increase file sizes, purge the model's components before saving them.
02. Position the model correctly in space.
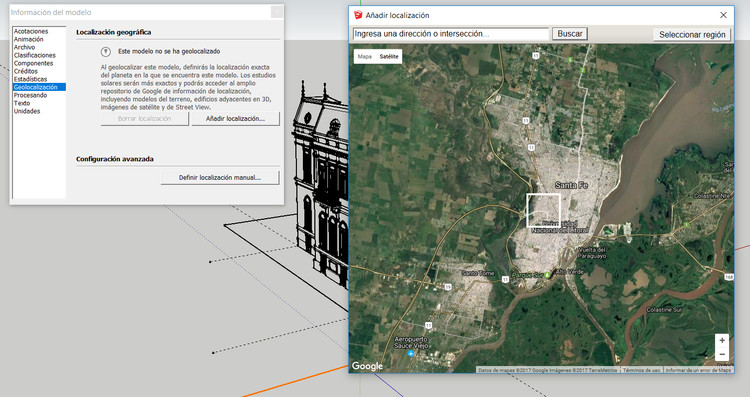
Geo-referencing a project allows you to consider it in relation to location, an inherent quality for any successful architectural scheme. If you want to position a 3D model, you can access it from the window> model information> geolocation> add location / define location manually.
Whatever the reason for positioning, you also need to take into account the time zone of each location.
Whatever the reason for positioning, you also need to take into account the time zone of each location.
03. Use plugins and check out the new stuff in Extension Warehouse.
SketchUp users develop a variety of plugins that not only solve problems in each version, but also exploit the potential of existing tools, and incorporate new 3D modeling equipment. Extensions range from Solar North, which provides tools to set the orientation for the angle of sunlight and shadows, to Sketchy FFD, a mesh defined by a series of control points in its vertices and edges that allow the manipulation of dimensions of the selected object.
04. Organize and save your toolbar settings.
Having a work environment customized to your needs and preferences is no small matter. It takes considerable time to organize a toolbar, so ensure that your ideal settings are saved for future use. The result will be an ability to execute tasks more efficiently, allowing you to invest more time in concepts, design, and detailing.
05. Use groups and components to simplify editing and constructing a model.
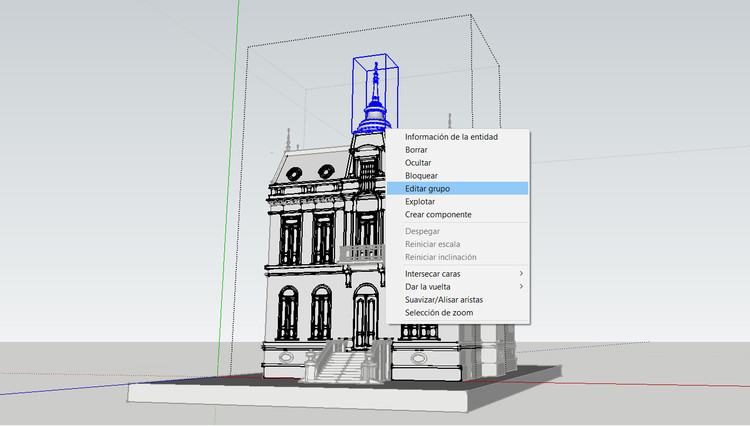
Organizing models into groups of objects, lines or figures are one of the most useful characteristics of SketchUp. Creating a group is quick and simple (secondary button> create group) and allows you to alter a particular section of your model (by double-clicking on it), without affecting other figures near the object. A good tip is to double-click on the newly created surface, thus selecting both faces and edges, and create a group before you start using the push / pull tool or any other modification.
06. Use layers, but not too many.
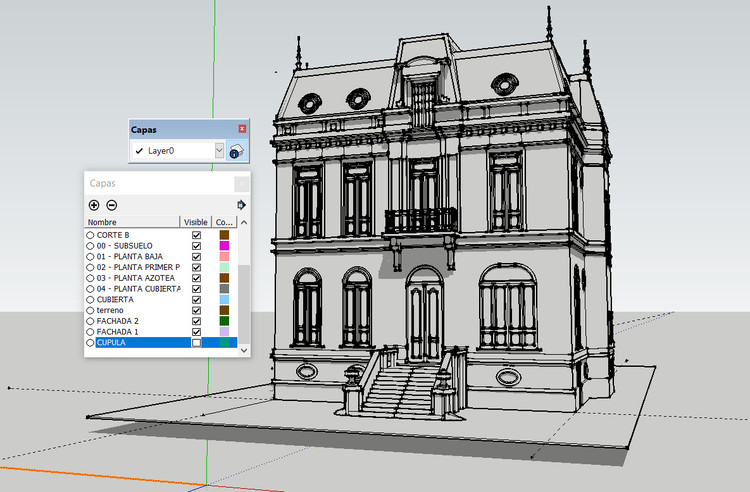
Establish a small number of layers for your 3D model in order to control what elements display on the screen. Hiding the layers you are not using (from Window> Layers) is a useful tip for accessing certain parts of the model, while at the same time allowing your model to respond more smoothly.
When importing elements created in other programs, or by other users, information contained within the layers is usually transferred to the new file/model. Therefore, take time to delete/reduce the surplus data which is currently adding nothing but MBs onto your file size.
When importing elements created in other programs, or by other users, information contained within the layers is usually transferred to the new file/model. Therefore, take time to delete/reduce the surplus data which is currently adding nothing but MBs onto your file size.
07. Reference other points on the model and make guides.
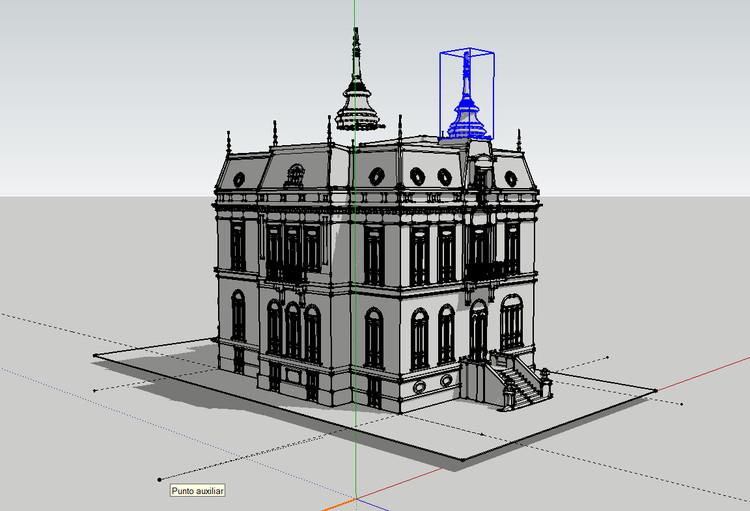
When creating or duplicating elements in a SketchUp model, the use of points, objects or reference guides is a good option to increase precision and accuracy.
If you need to copy an object with a reference point, you have to select the item to duplicate, choose a reference point in space and then press the Ctrl key to activate copy mode. If you’re generating another reference element, you can insert a guide by selecting the 'Measure' tool with guide creation activated (Ctrl key), and click on the beginning of an existing edge and its extension.
If you need to copy an object with a reference point, you have to select the item to duplicate, choose a reference point in space and then press the Ctrl key to activate copy mode. If you’re generating another reference element, you can insert a guide by selecting the 'Measure' tool with guide creation activated (Ctrl key), and click on the beginning of an existing edge and its extension.
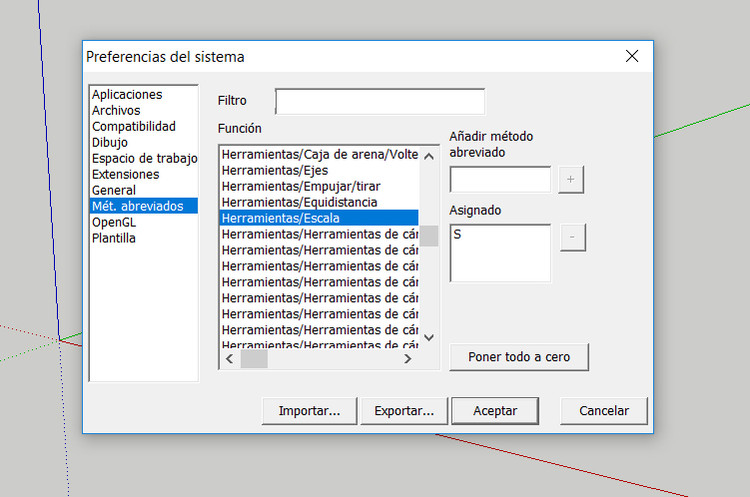
08. Keyboard shortcuts.
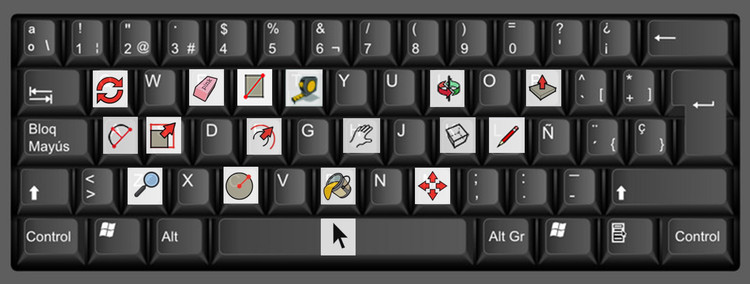
Like any 3D modeling software, using the keyboard allows quick access to tools and tool variations. While SketchUp already has preset shortcuts, they can be customized and edited (by accessing Window> Preferences> Shortcuts) according to your personal preference.
It is important to read the different actions and variations that allow you to perform the key combinations, usually indicated in the lower left of the screen depending on each tool you select.
It is important to read the different actions and variations that allow you to perform the key combinations, usually indicated in the lower left of the screen depending on each tool you select.
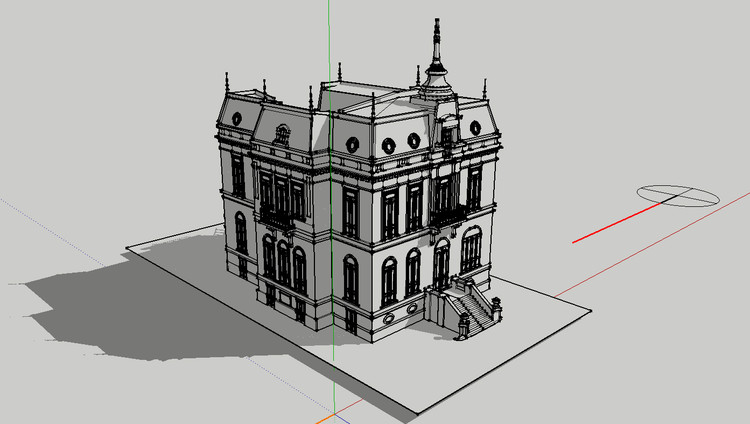
09. Use the appropriate visual style each time.
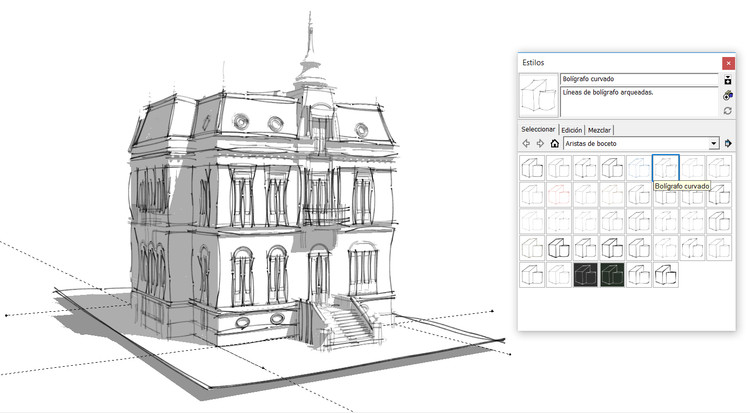
SketchUp has built-in visual graphic styles to generate artistic effects, or to alter hidden geometries and back edges. You’ll need to identify specifically what you want to visualize when making your 3D model because each style demands a greater processing of information by your computer, which translates into a reduction in performance.
We recommend using standard styles in the 3D modeling process, as well as disabling the visualization of hidden geometries, shadows and textures/materials.
We recommend using standard styles in the 3D modeling process, as well as disabling the visualization of hidden geometries, shadows and textures/materials.
10. Use scene manager to set and save views.

Scene manager options, accessed from Window> Scenes, allow you to add, update and delete viewpoints proposed by the original user; creating different camera angles to communicate, understand, and animate the project.
When choosing views, 'Place Camera' is a useful precision tool, controlling the camera's height in relation to the ground, and freely rotating it to establish the ideal point of view to sell your idea.
When choosing views, 'Place Camera' is a useful precision tool, controlling the camera's height in relation to the ground, and freely rotating it to establish the ideal point of view to sell your idea.
Comments
Post a Comment